Transforming Kitchens: From Dull to Dynamic with Expert Bulkhead Installation
Scope of the Project
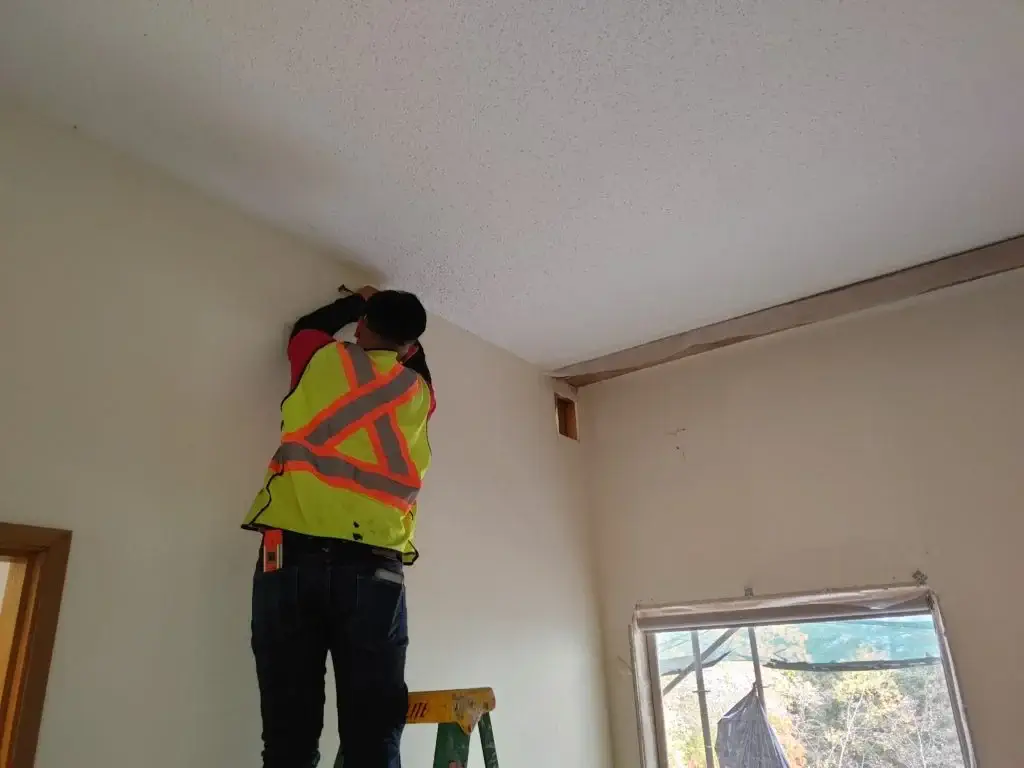

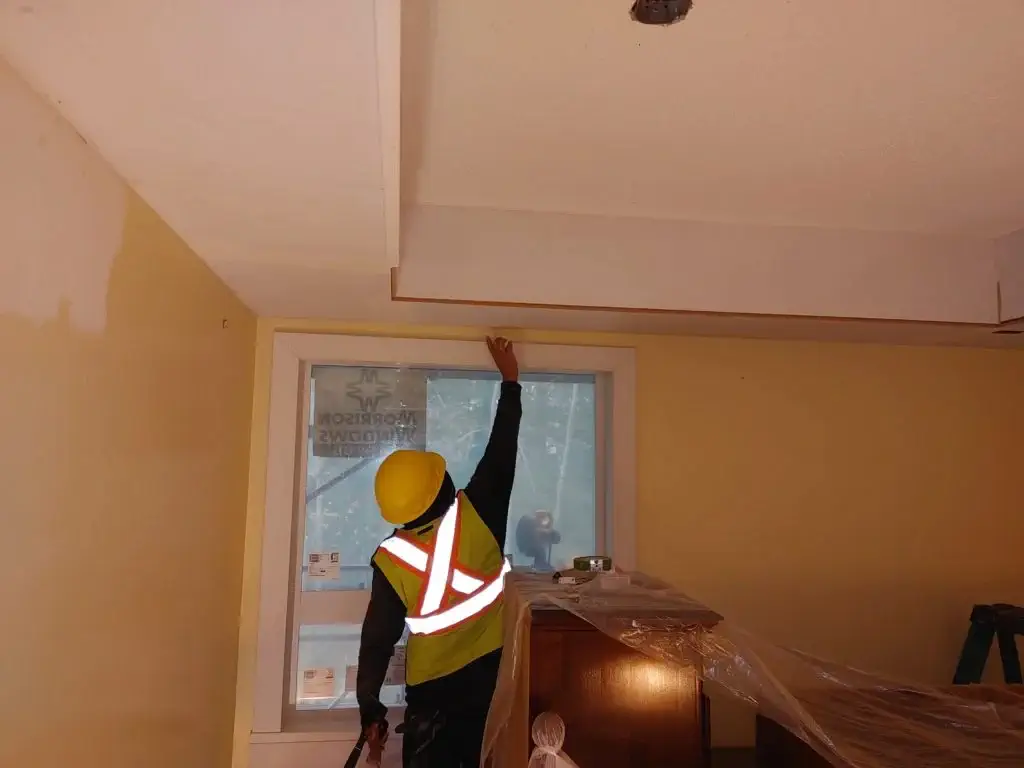
The primary purpose of installing bulkheads is to conceal intake exhausts, refrigerating lines, and electrical wiring in the kitchen, creating a more polished and organized look. After measuring the installation area, we carefully made precise cuts in the wood to begin constructing the soffit ladder frame. We utilized a laser level to ensure everything was perfectly aligned and securely installed. The measurements varied depending on each unit, as we aimed to create the illusion that the bulkhead was a natural extension of the kitchen cabinets.
Building the Soffit Ladder Frame
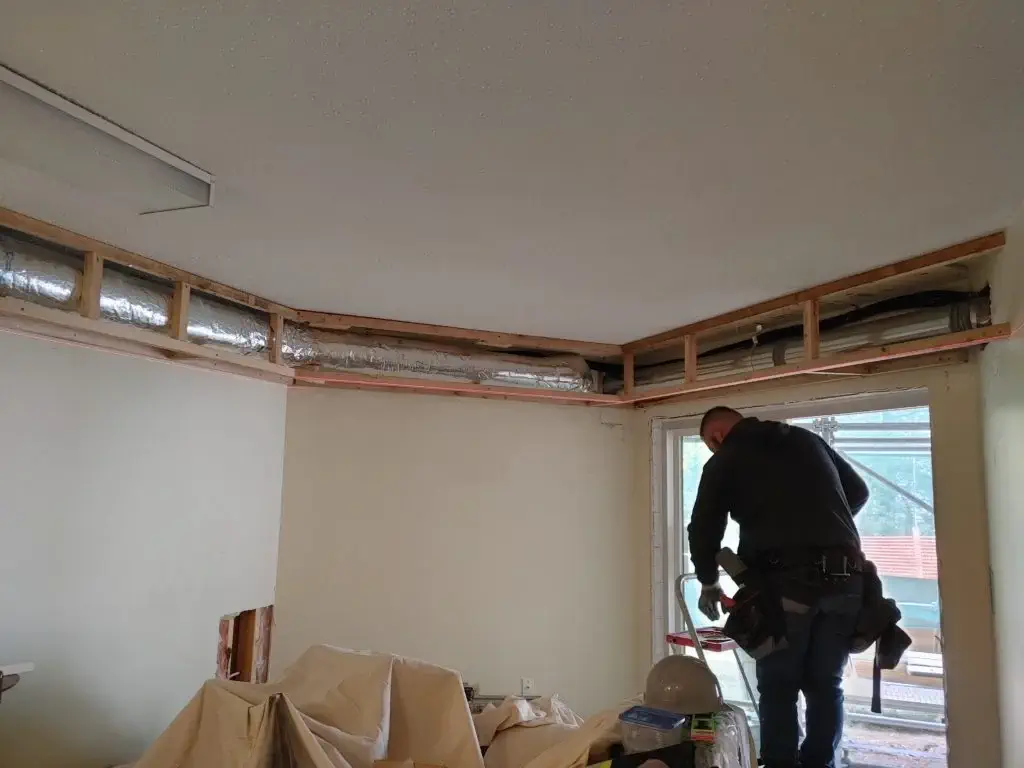
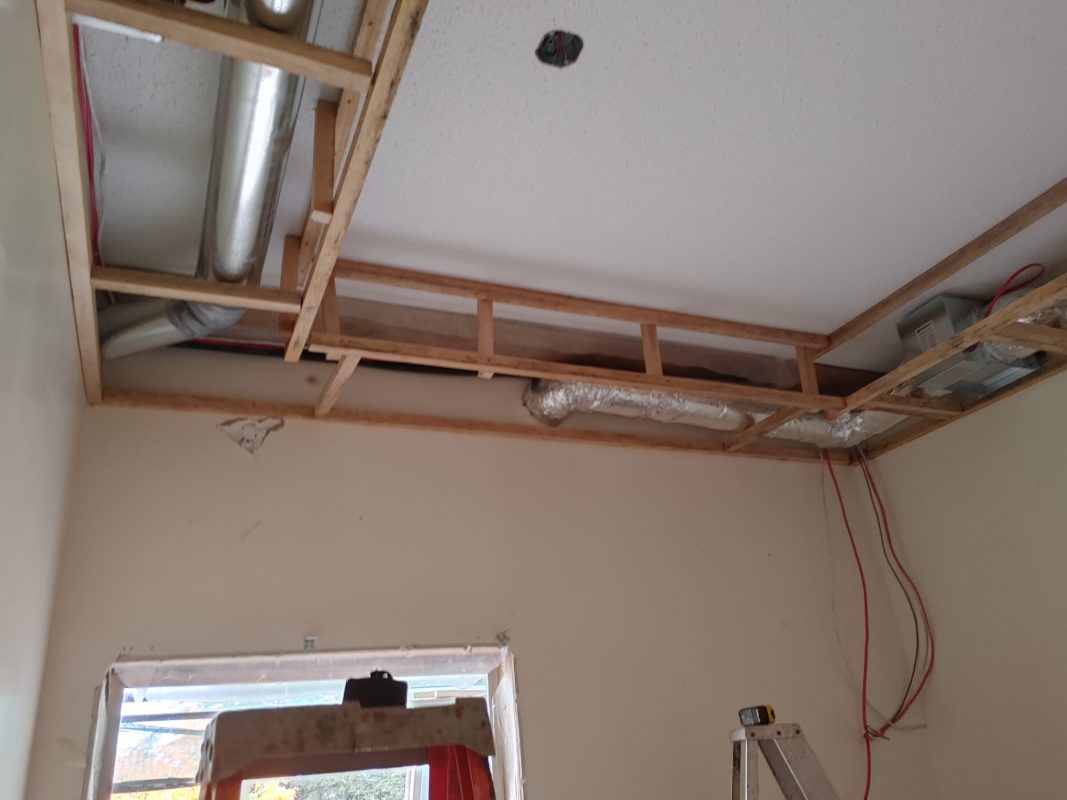
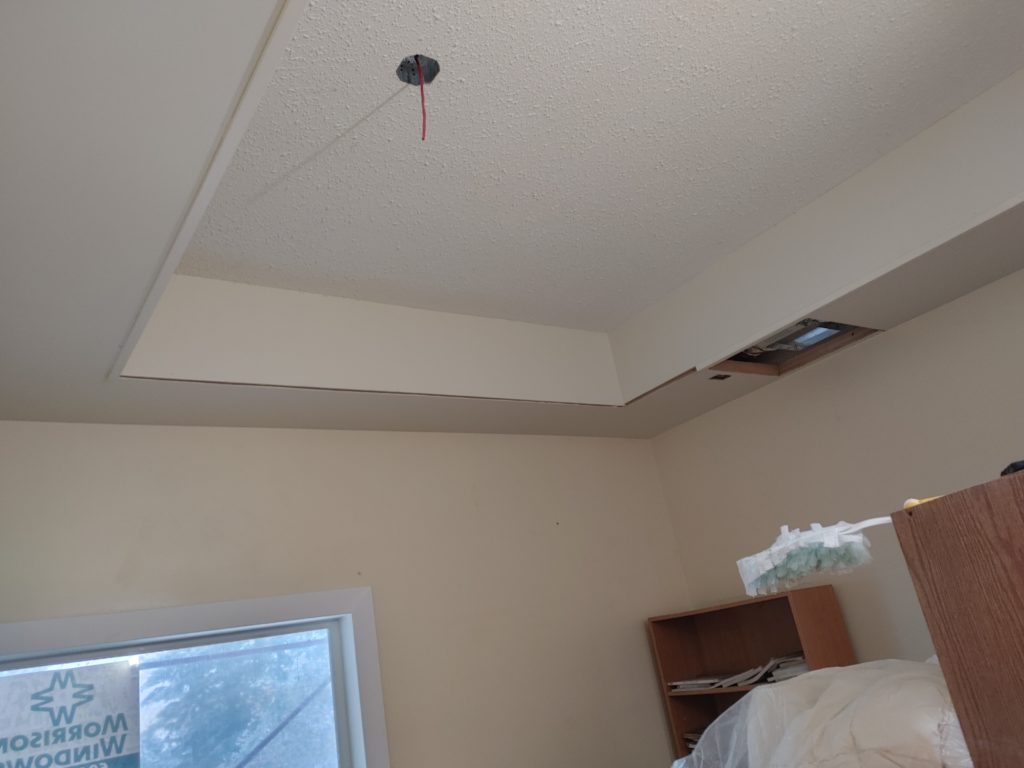
With the measurements in hand, we commenced the construction of the soffit ladder frame—an essential component in the bulkhead installation process. Precision and accuracy were paramount, so we carefully cut the wood to the exact lengths and angles needed, accounting for any variations in the unit’s layout. Ensuring the frame was completely square and level, we utilized specialized tools to secure each piece in place.
To maintain consistency and alignment, we rigorously checked the entire frame using a laser level. This step allowed us to identify and correct any discrepancies, ensuring that the soffit ladder frame was perfectly aligned.
Boarding with Drywall
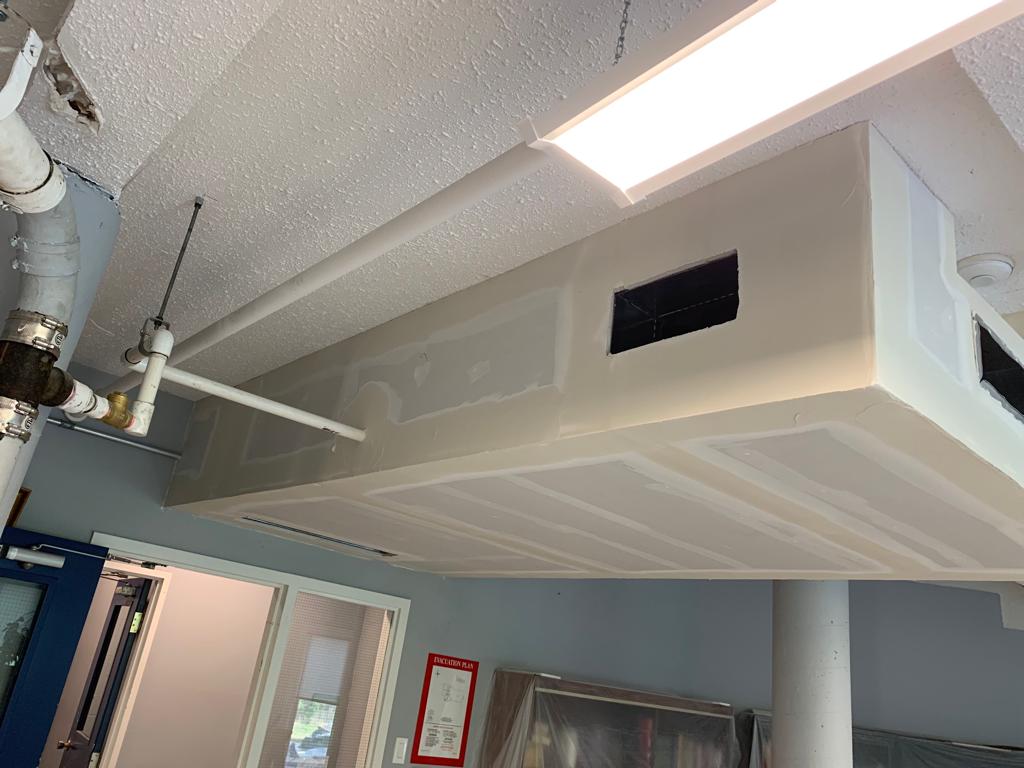
After securing the soffit ladder frame, the next crucial step in our bulkhead installation process was boarding it with drywall. Precision was key, as each piece of drywall needed to be carefully cut to the exact dimensions of the frame. We ensured the drywall was securely fastened, paying special attention to making it perfectly flush with the frame to achieve a seamless, professional finish.

Taping, Mudding, and Sanding
Taping, mudding, and sanding are essential steps in perfecting the finish of a bulkhead installation. Once the drywall was securely in place, our team began by applying joint tape to cover the seams between the sheets. We made sure the tape was applied smoothly to create a uniform base for the next steps.
Following the taping, we moved on to mudding. We spread the compound evenly over the tape and the surrounding surface, taking care to avoid excess that could cause bumps or uneven areas. After allowing the mud to dry, we sanded the surface with fine-grit sandpaper, achieving a flawless, smooth finish.
Priming and Painting
With the bulkheads installed and drywalled, we moved on to the priming and painting stages to achieve a polished and finished look for the bulkhead installation. We began by selecting a high-quality primer designed to bond well with the drywall, ensuring a strong foundation for the paint. The primer was applied evenly across the bulkheads and affected walls using a premium brush to avoid any brush marks or streaks.
Once the primer had dried completely, we proceeded with painting. We chose a high-quality paint that matched the existing kitchen walls, aiming for a cohesive and uniform appearance. Applying the paint in thin, even coats with a roller and brush allowed us to achieve a smooth and consistent finish.
To make sure the repairs were seamless, we employed a corner-to-corner painting technique. This method involved painting from corner to corner on each wall rather than stopping at the bulkheads, blending the new work perfectly with the existing kitchen decor.
We took care to protect the surrounding areas throughout the process by covering floors and countertops with drop cloths and using painter’s tape to shield fixtures and appliances from any paint drips or splatters. This attention to detail ensured that the final result was both professional and visually appealing, completing the bulkhead installation with a flawless finish.
Transforming a kitchen with expert bulkhead installation not only enhances its visual appeal but also adds a touch of sophistication and functionality. Our recent project in Williams Lake, BC, showcased our commitment to excellence through every stage of the process, from precise measurements to the final coat of paint. By focusing on quality and attention to detail, we were able to deliver a seamless and professional finish that seamlessly integrated with the existing kitchen design.