
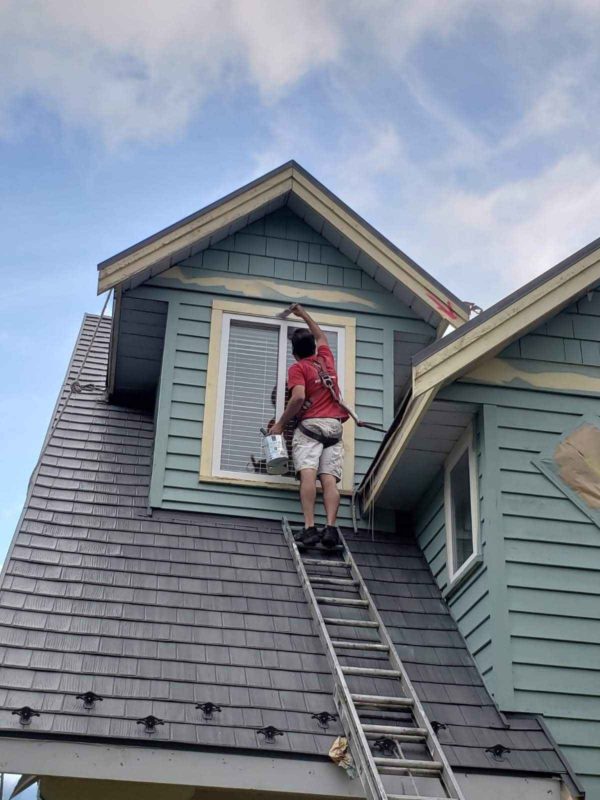
Flawless Spring Exterior Painting Prep: Essential Steps for a Long-Lasting Finish
As the weather warms up and days get longer, spring exterior painting prep becomes a top priority for homeowners looking to refresh their property’s curb appeal. Spring is the ideal time for exterior painting because it offers mild temperatures, lower humidity levels, and optimal drying conditions, allowing paint to adhere properly and last longer.
However, achieving a flawless, long-lasting finish isn’t just about choosing the right color—it starts with thorough preparation. Proper cleaning, repairing, and priming ensure the new paint bonds well to the surface, preventing peeling, cracking, and premature fading. Skipping these steps can lead to costly touch-ups and shorter paint longevity.
By tackling exterior painting projects early in the season, homeowners can avoid the rush of peak summer demand, secure top-quality painting services, and ensure their home looks fresh and protected for the months ahead. In this guide, we’ll walk through the essential steps of spring exterior painting prep, so you can achieve a professional-quality finish that stands the test of time.
Why Proper Prep is Essential for Exterior Painting
Proper spring exterior painting prep is the foundation of a high-quality, long-lasting paint job. Skipping or rushing through preparation can lead to peeling, cracking, or uneven coverage, causing the paint to deteriorate much sooner than expected. Investing time in thorough prep work ensures that your exterior surfaces are smooth, clean, and ready to hold paint effectively.
Improving Paint Adhesion
One of the most important reasons for proper prep is paint adhesion. Dirt, dust, and old peeling paint create a barrier that prevents new paint from bonding correctly. Without a clean and primed surface, paint is more likely to chip or wear away prematurely. Taking the time to wash, sand, and prime surfaces ensures the paint sticks properly and remains durable through various weather conditions.
Preventing Peeling, Cracking, and Bubbling
Without proper preparation, moisture can get trapped beneath the new coat of paint, leading to bubbling, peeling, and cracking over time. Cleaning and priming the surface create a protective layer that helps prevent these issues. Additionally, checking for damage—such as rotted wood or cracks—before painting ensures that structural problems don’t worsen under the new paint.
Achieving a Smooth, Professional Finish
Even the highest-quality paint won’t look great on a poorly prepared surface. Uneven textures, old paint chips, and surface imperfections can create an unprofessional, blotchy appearance. Proper spring exterior painting prep includes sanding rough areas, filling in gaps, and applying primer to create a flawless, even surface that enhances the final look and extends the paint’s lifespan.

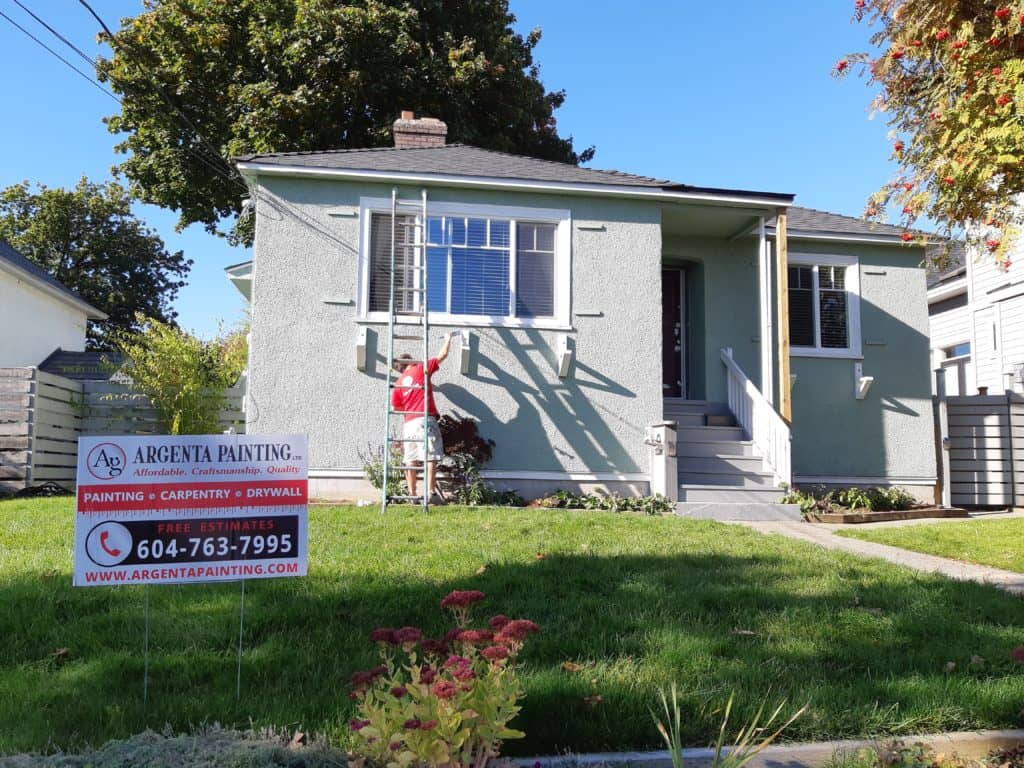
By taking the time to prepare properly, you set yourself up for a beautiful, long-lasting exterior paint job that protects your home and enhances its curb appeal for years to come.
Cleaning the Surface Before Painting
A clean surface is the foundation of any successful spring exterior painting prep. Dirt, mold, and peeling paint prevent new paint from properly adhering, leading to uneven coverage and premature deterioration. By thoroughly cleaning your home’s exterior, you create a smooth, stable surface that allows the paint to bond correctly, ensuring a flawless and long-lasting finish.
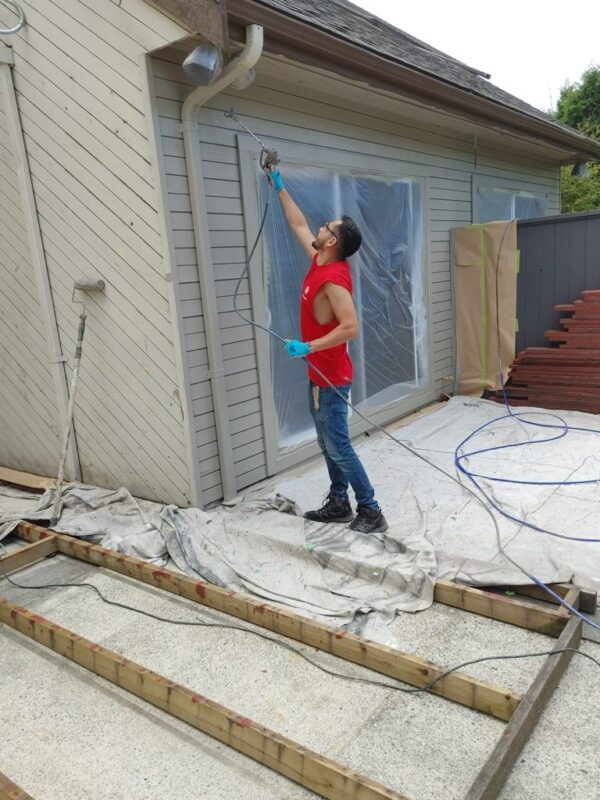
Best Methods for Cleaning Exterior Surfaces
ifferent surfaces require different cleaning techniques, but the goal remains the same—removing debris and ensuring a smooth, paint-ready surface.
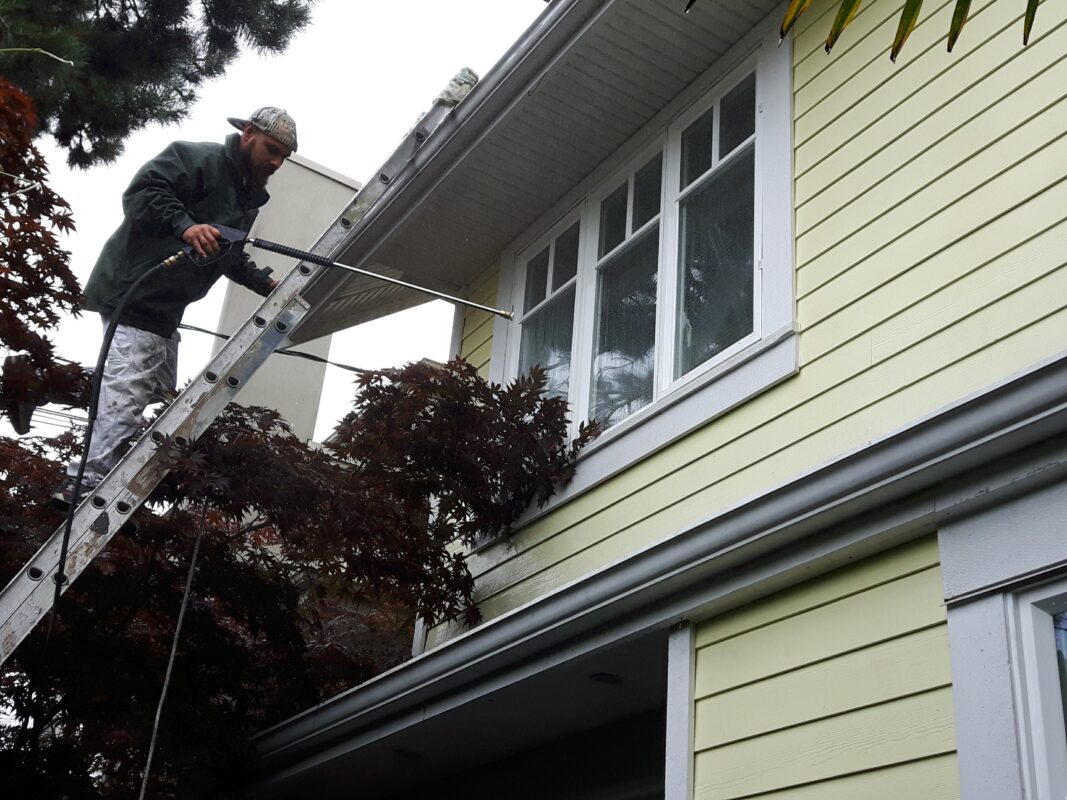
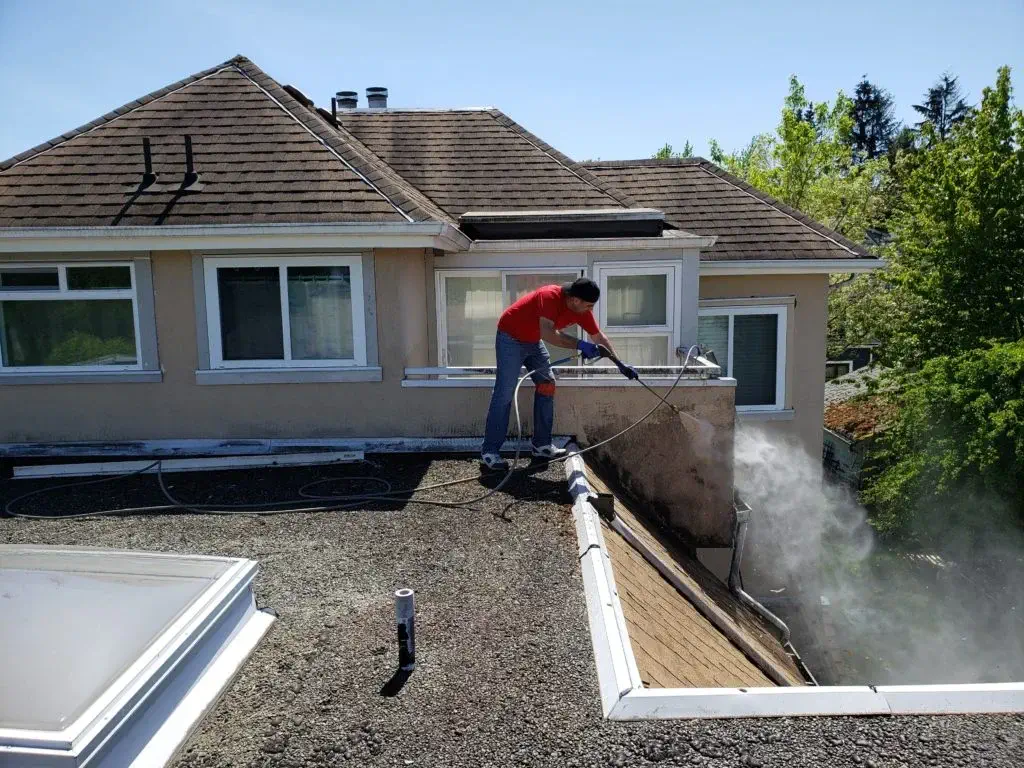
🔹 Power Washing – One of the most effective ways to clean siding, brick, and stucco. Power washing removes dirt, loose paint, and mildew, but it should be used carefully to avoid damaging wood or softer surfaces.
🔹 Scrubbing with Detergent – A milder approach using a long-handled brush, water, and mild detergent. This method is great for wooden surfaces or areas where power washing may be too harsh.
🔹 Mold & Mildew Removal – For homes with visible mold or mildew, using a solution of water and bleach (or a commercial mold remover) ensures these issues don’t continue beneath the fresh coat of paint.
Why Cleaning is Crucial
Over time, your home’s exterior accumulates dust, pollen, mold, mildew, and grime. If these contaminants aren’t removed before painting, they can interfere with paint adhesion, causing bubbling, flaking, or peeling. Old, loose paint also needs to be stripped away to ensure the new coat applies evenly and lasts for years. Taking the time to clean properly prevents future paint failures and enhances the overall look of your home.

Allowing Surfaces to Dry Before Painting
Once the exterior is thoroughly cleaned, it’s crucial to let surfaces dry completely before applying paint. Trapped moisture can lead to bubbling and peeling, ruining the finish. Depending on weather conditions, drying can take anywhere from 24 to 48 hours. Painting on a fully dry surface ensures the paint adheres properly and lasts longer.
By taking the time to clean your exterior properly, you set the stage for a smooth, professional-quality paint job that enhances your home’s curb appeal and protects it from the elements for years to come.
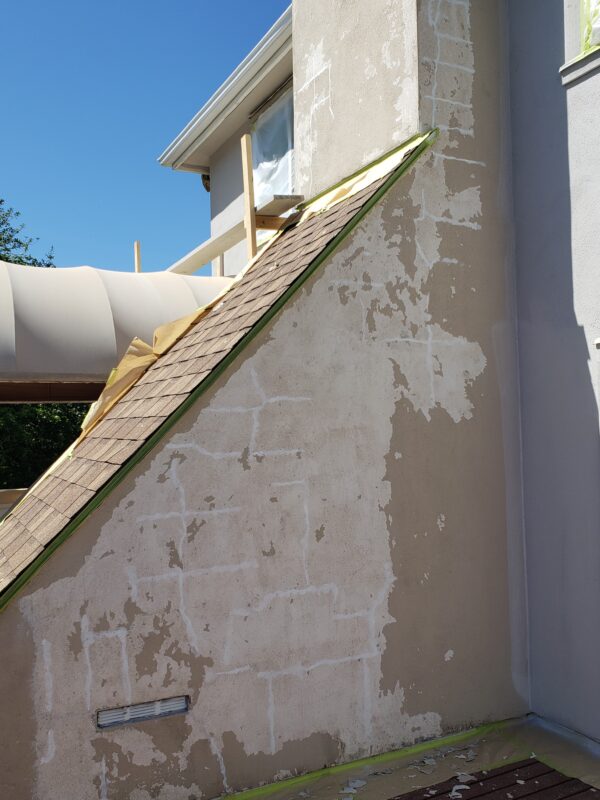
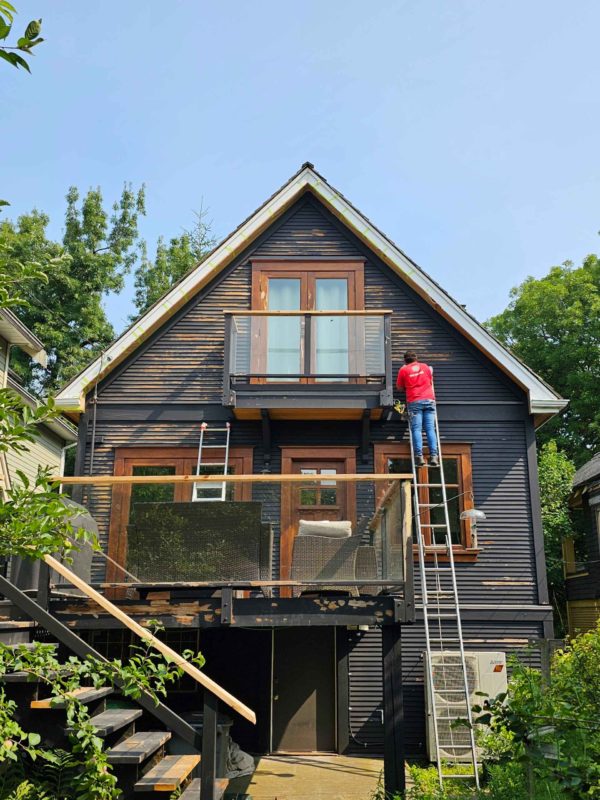
Inspecting and Repairing Damaged Areas
A successful spring exterior painting prep starts with a detailed inspection of your home’s exterior. Painting over cracks, peeling paint, or wood rot can lead to an uneven finish and costly repairs later. Taking the time to fix these issues ensures that your spring exterior painting prep results in a durable, professional-quality paint job that will last for years.
Checking for Cracks, Peeling, and Wood Rot
A thorough inspection is a key step in spring exterior painting prep, helping to identify areas that need repair before painting. Look for:
🔹 Cracks in siding, stucco, or trim – Small cracks can allow moisture to seep in, causing further damage beneath the surface. Repairing these before moving forward with spring exterior painting prep is essential for long-term protection.
🔹 Peeling or bubbling paint – This is often a sign of poor adhesion from a previous paint job or underlying moisture issues. Removing loose paint is crucial for smooth and lasting results in your spring exterior painting prep.
🔹 Wood rot – If wooden surfaces are soft, crumbling, or discolored, they need to be replaced before applying paint. Painting over rotted wood during your spring exterior painting prep will only temporarily hide the issue while the damage worsens underneath.
Patching Holes and Repairing Siding or Trim
Once you’ve identified problem areas, the next step in spring exterior painting prep is making the necessary repairs.
Fill cracks and holes with exterior caulk or wood filler – Sealing gaps ensures your paint adheres smoothly and prevents moisture infiltration. This step is essential for achieving a flawless look during spring exterior painting prep.
Replace severely damaged siding or trim – If large sections of wood or siding are compromised, replacing them is necessary before proceeding with spring exterior painting prep.
Prime repaired surfaces – Applying primer to patched or replaced areas helps ensure even coverage and strong adhesion when you begin your spring exterior painting prep.
Sanding for a Smooth Finish
To complete your spring exterior painting prep, sanding is a vital step that improves the overall look and durability of your paint job. Sanding:
🔹 Removes old, flaking paint – This prevents premature peeling after your spring exterior painting prep.
🔹 Smooths out rough patches – Uneven surfaces can result in streaky or patchy paint, making this an important part of spring exterior painting prep.
🔹 Enhances paint adhesion – A properly sanded surface allows the new paint to bond securely, ensuring your spring exterior painting prep results in a lasting, high-quality finish.
By carefully inspecting, repairing, and sanding during your spring exterior painting prep, you create a strong foundation for a durable and professional paint job. These steps protect your home’s exterior while enhancing curb appeal and preventing costly future repairs. Prioritizing spring exterior painting prep now ensures your home stays beautiful and well-protected for years to come.
Priming for a Long-Lasting Paint Job
Choosing the Right Paint for Spring Exterior Painting
Selecting the right paint is a crucial part of spring exterior painting prep, ensuring both durability and protection. Exterior paint must withstand changing weather conditions, so choosing a high-quality, weather-resistant formula is essential. Look for paints with UV protection to prevent fading, moisture resistance to combat rain and humidity, and a flexible finish that expands and contracts with temperature changes.
According to Sherwin-Williams, “Investing in premium paints ensures better color retention, superior durability, and longer-lasting protection against harsh weather conditions” (Sherwin-Williams). While budget-friendly options may seem appealing, premium paints provide better coverage, reduce maintenance needs, and prevent peeling or cracking—saving you money in the long run.
Best Weather Conditions for Exterior Painting
Weather plays a major role in achieving a successful spring exterior painting prep, as temperature and humidity directly impact paint application and drying time. Painting in the wrong conditions can lead to uneven drying, poor adhesion, and premature peeling, reducing the longevity of your exterior paint job.
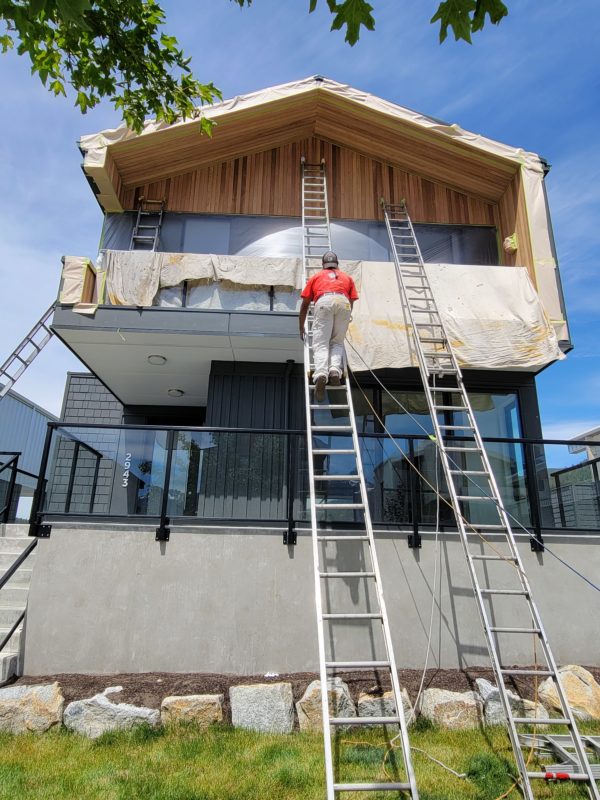
Proper spring exterior painting prep is essential for achieving a long-lasting, professional-quality finish. Taking the time to clean, repair, prime, and choose the right paint ensures that your home’s exterior is well-protected against the elements while enhancing curb appeal. By following these steps, homeowners can prevent peeling, cracking, and premature wear, saving money on future maintenance.
Spring is the perfect time to refresh your home’s exterior, but as the season gets busier, painting services book up quickly. Starting early helps you avoid delays and ensures your project is completed under ideal weather conditions.

Ready to transform your home’s exterior? Contact Argenta Restoration Ltd. for professional exterior painting services. Our expert team will handle all the prep work and application to give your home a flawless, long-lasting finish. Get in touch today to schedule your consultation!